Placemat Instructions In Action
Published
Wondering what using placemat instructions in your classroom would look like?
This week’s blog shares my experience doing the “Silly Walks” challenge using LEGOⓇ Education SPIKE™ Prime with a group of students in an after-school robotics club. This club was held virtually once a week for one hour, with approximately six students from grades 9-12 attending each session. Note that I go through a similar progression when using the placemat instructions in the traditional in-person classroom setting as well. In either case, I start by directing students to the placemat instruction and introducing the challenge. I take this initial opportunity before students have started brainstorming or building to situate the challenge in a relevant context and to connect the activity to what students may be learning about in other subjects.
When doing the Silly Walks challenge with my students, I started the activity by introducing the challenge and leading students in a rapid brainstorming session about different ways that animals move around (i.e. hopping, slithering, walking, crawling, etc.). We discussed relevant science concepts such as biomimicry, evolution, and adaptations to change. We shared ideas about how we could model the motion of a frog hopping using parts from the SPIKE Prime set. Next, I prompted students to think about why building a robot that doesn’t use wheels, but instead uses another mode of movement, might be useful. Students shared ideas about how not using wheels might allow the robot to travel over different types of terrain or fit into smaller oddly shaped spaces. After this short (ten minutes or less) discussion relating to the prompt, I invited students to start building, iterating, collaborating, and testing.
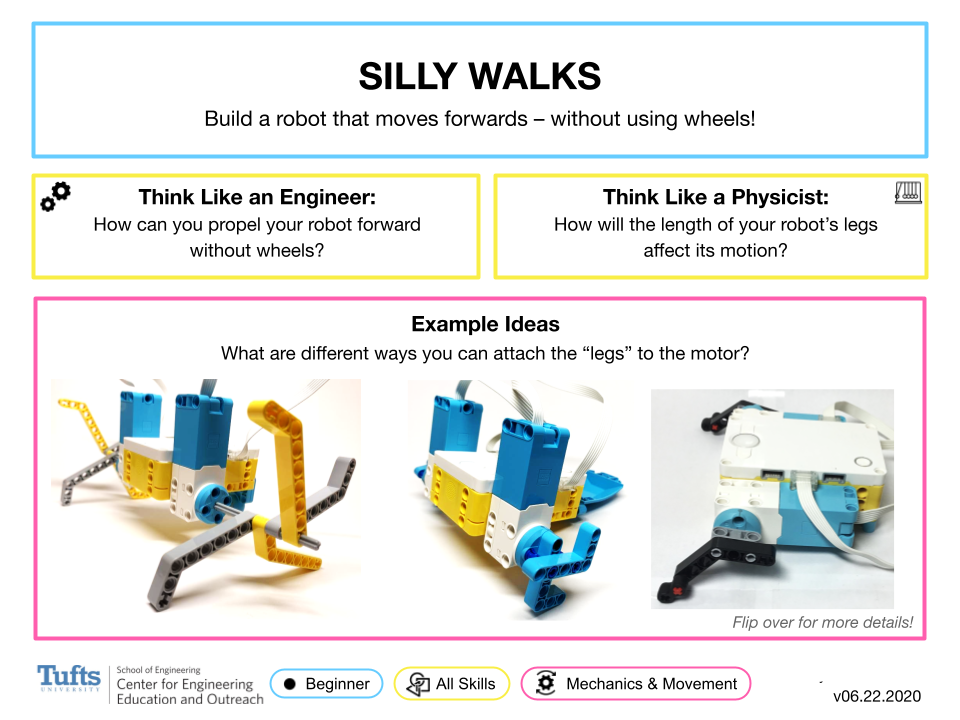
When using a placemat instruction, I typically find that some students may struggle at first to get started or get stuck midway through their design process. One of my students was hesitant to start building, so I suggested he start by replicating one of the solutions shown on the front of the placemat instruction. He started to build the robot from the leftmost image in the “Example Ideas” area of the placemat instruction, but then decided he wanted to attach his motors differently and create a different configuration of “legs” that would push the robot forwards when the motor spun.
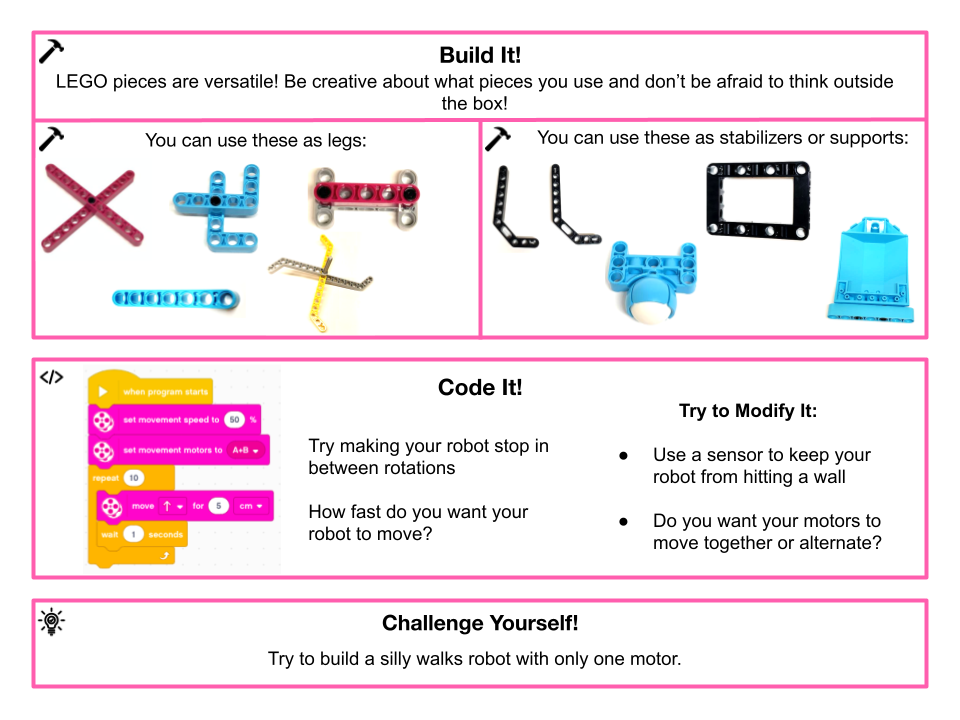
If several students in the class are asking similar questions or struggling with the same aspect of the design challenge, the “Build it!” or “Code it!” zones of the activity brief can serve as a useful way for the teacher to share ideas with the whole class. For example, several of the students in the robotics club were struggling to get both of their motors to rotate at the same time. I asked everyone to stop working while I showed them the back of the placemat instruction and highlighted how to use the pink movement blocks to get both motors to move simultaneously.
Sometimes students don’t use the placemat instruction at all, and that’s OK! One of my students, Leo, didn’t use the guidance at all, and finished building his Silly Walker halfway through the session. Everyone else was still working, so I directed Leo to the extension challenge zone of the placemat instruction, and he spent the rest of the time trying to convert his Silly Walker to be powered by only one motor instead of his original two motor design. It was helpful to have an extension ready to go to help keep Leo engaged and appropriately challenged.
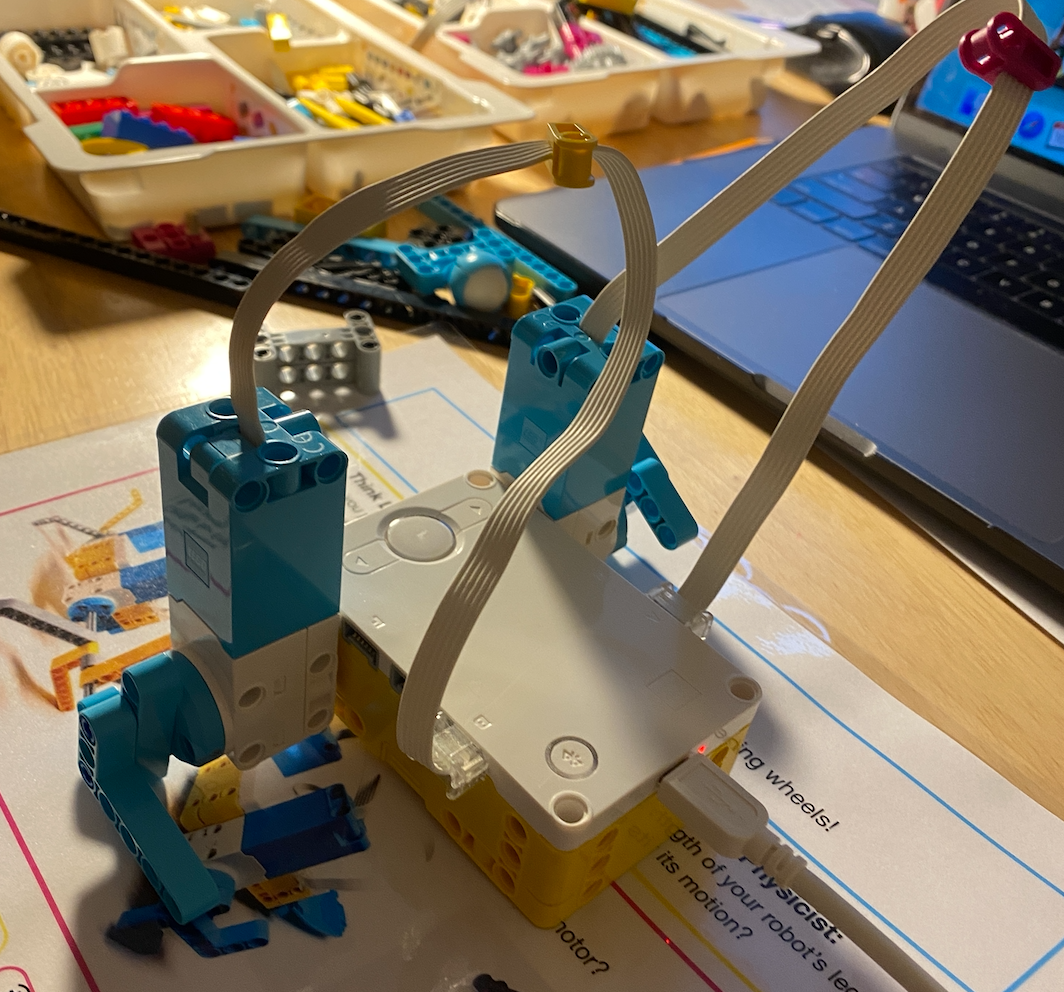
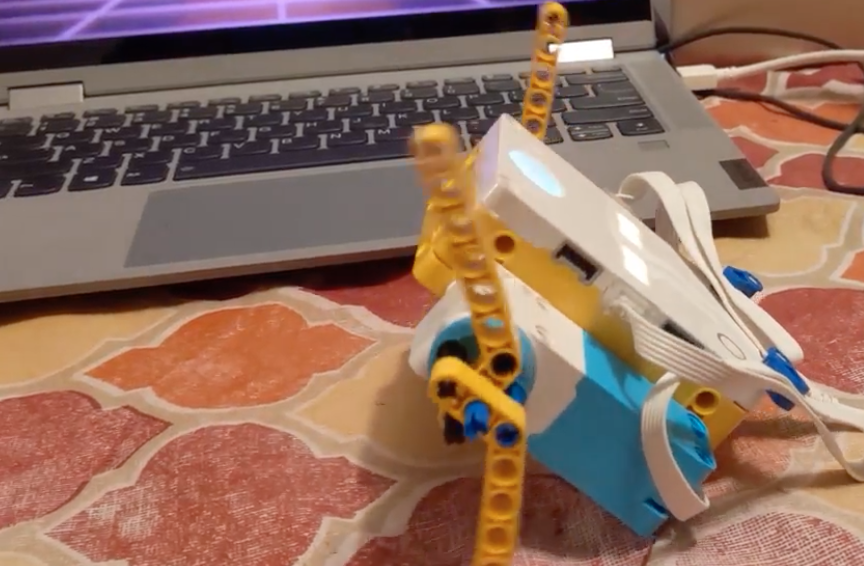
The best part about using a placemat instruction is that, inevitably, every student or/student group will build something different, and will iterate on their unique design multiple times! Below are some of the different Silly Walker robots my students came up with.
Make sure to take time at the end of class to have a discussion and highlight all of the different solutions students came up with. Talking about aspects of each design that did or did not work well is a rich opportunity for students to make connections to scientific phenomena and engage in one of the most important aspects of the engineering design process - sharing ideas.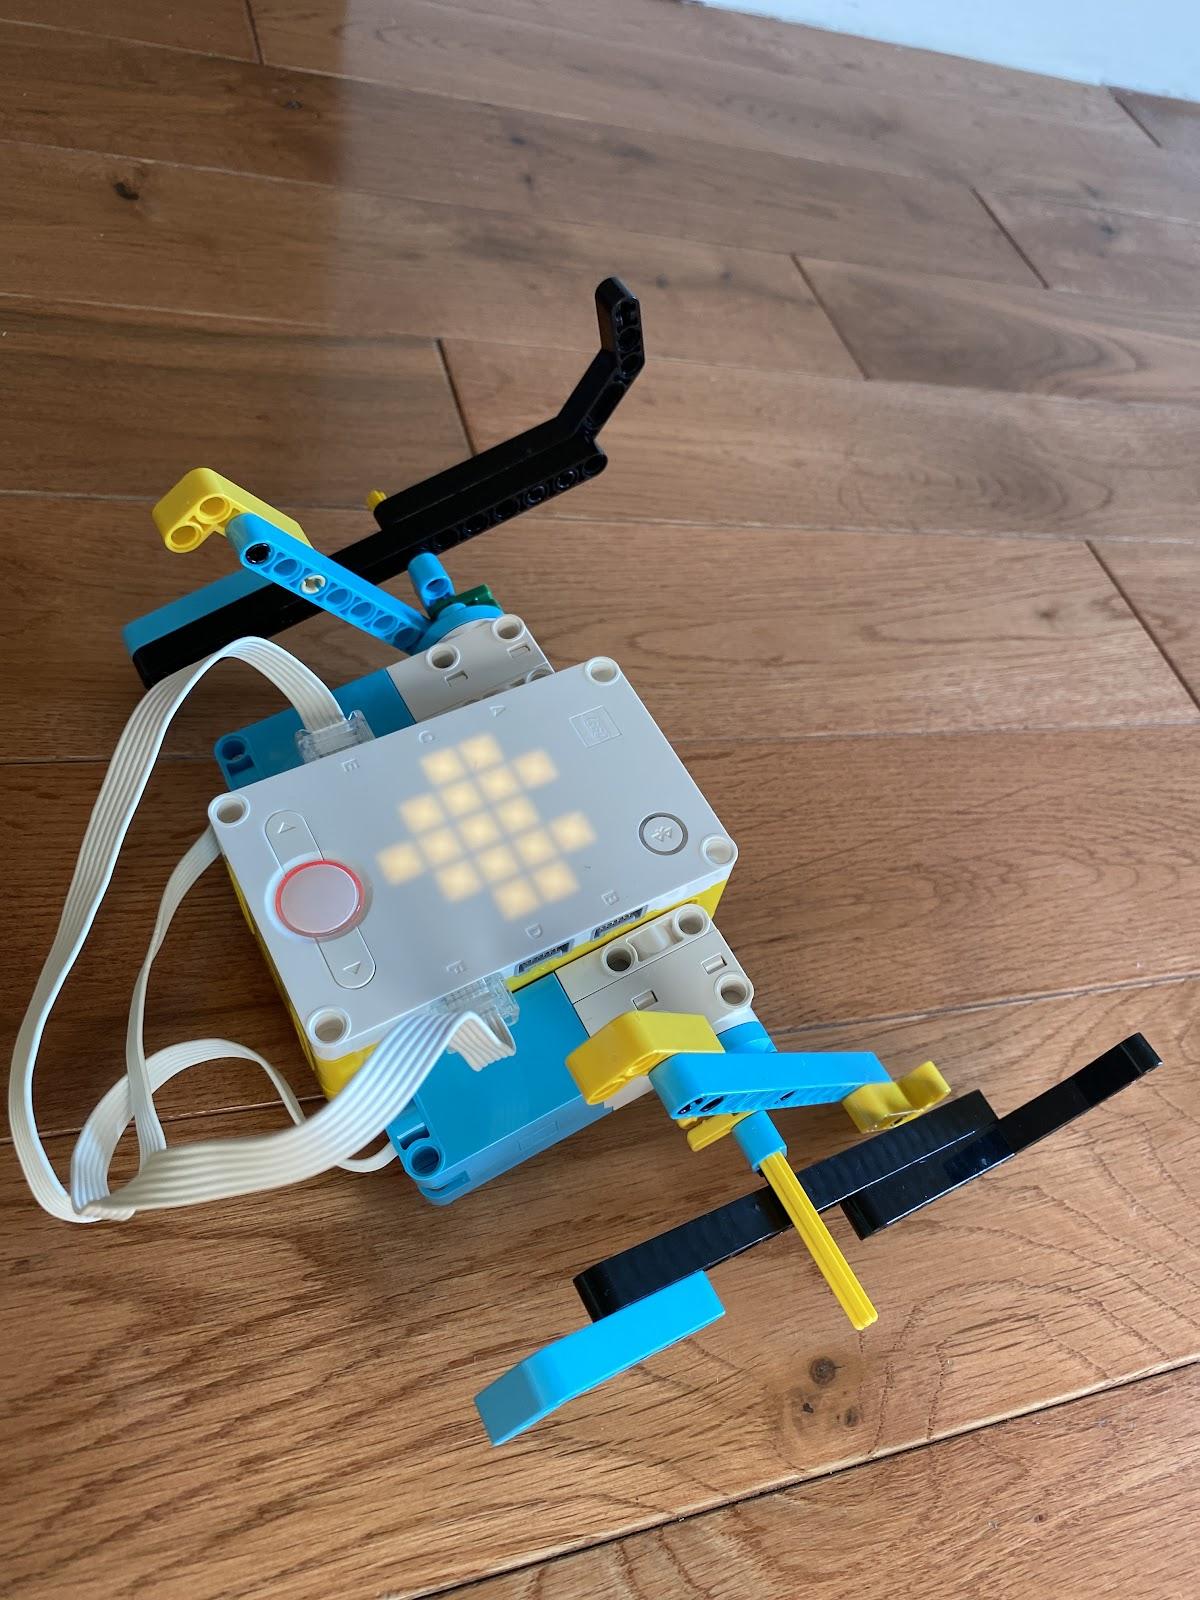
You can find the “Silly Walks” activity brief, along with other activity briefs for SPIKE Prime published on the LEGO Education website. Additionally, you can find over 100 placemat instruction activities for LEGO Education solutions and other robotics products at CEEO INNOVATIONS.
Introducing the Activity
When doing the Silly Walks challenge with my students, I started the activity by introducing the challenge and leading students in a rapid brainstorming session about different ways that animals move around (i.e. hopping, slithering, walking, crawling, etc.). We discussed relevant science concepts such as biomimicry, evolution, and adaptations to change. We shared ideas about how we could model the motion of a frog hopping using parts from the SPIKE Prime set. Next, I prompted students to think about why building a robot that doesn’t use wheels, but instead uses another mode of movement, might be useful. Students shared ideas about how not using wheels might allow the robot to travel over different types of terrain or fit into smaller oddly shaped spaces. After this short (ten minutes or less) discussion relating to the prompt, I invited students to start building, iterating, collaborating, and testing.
Supporting Student Thinking
When using a placemat instruction, I typically find that some students may struggle at first to get started or get stuck midway through their design process. One of my students was hesitant to start building, so I suggested he start by replicating one of the solutions shown on the front of the placemat instruction. He started to build the robot from the leftmost image in the “Example Ideas” area of the placemat instruction, but then decided he wanted to attach his motors differently and create a different configuration of “legs” that would push the robot forwards when the motor spun.
While he started out by replicating the idea provided in the placemat instruction, he ultimately came up with his own unique solution through a series of tests and iterations.
If several students in the class are asking similar questions or struggling with the same aspect of the design challenge, the “Build it!” or “Code it!” zones of the activity brief can serve as a useful way for the teacher to share ideas with the whole class. For example, several of the students in the robotics club were struggling to get both of their motors to rotate at the same time. I asked everyone to stop working while I showed them the back of the placemat instruction and highlighted how to use the pink movement blocks to get both motors to move simultaneously.
Sometimes students don’t use the placemat instruction at all, and that’s OK! One of my students, Leo, didn’t use the guidance at all, and finished building his Silly Walker halfway through the session. Everyone else was still working, so I directed Leo to the extension challenge zone of the placemat instruction, and he spent the rest of the time trying to convert his Silly Walker to be powered by only one motor instead of his original two motor design. It was helpful to have an extension ready to go to help keep Leo engaged and appropriately challenged.
Synthesizing Student Learning
The best part about using a placemat instruction is that, inevitably, every student or/student group will build something different, and will iterate on their unique design multiple times! Below are some of the different Silly Walker robots my students came up with.Make sure to take time at the end of class to have a discussion and highlight all of the different solutions students came up with. Talking about aspects of each design that did or did not work well is a rich opportunity for students to make connections to scientific phenomena and engage in one of the most important aspects of the engineering design process - sharing ideas.
Give One A Try!
You can find the “Silly Walks” activity brief, along with other activity briefs for SPIKE Prime published on the LEGO Education website. Additionally, you can find over 100 placemat instruction activities for LEGO Education solutions and other robotics products at CEEO INNOVATIONS.
Blog LEGO® Education Tips and Tricks
11/03/2021 9:00am EDT
Leave a Comment
Thank you @Marek Lewandowski and @David Ewart for flagging. The Professional Development platform linked here has been retired. You can now find more information about Professional Development on this page: Professional Development and Training | LEGO® Education
Hi. Could you explain to us how to reach this content after the site retired? This content is gold for teachers. thx.
When I go to the link you posted, click on self-guided learning, then I'm directed to
where I get the message that it's being closed down. So you replace a page, which you are retiring, by the same page, only linked elsewhere. Or am I missing something?
Links go to 403 forbidde.
Link check: Unable to access the links in the Want to learn more section? appears the link is broken, or password protected. Not able to locate with the LEGO Educator Success PD site.